If you ask us what the most complex thing we have ever heard about is, we would confidently say “digitizing”. Hands down! Well, it’s not that difficult to learn but explaining it might take some time. And the exciting thing about it is that it’s not the first time we are decoding it.
What is Embroidery Digitizing?
It is a process of converting any information into a digital form. And when it comes to digitizing, it gets simpler – aligning any artwork into stitches with the help of embroidery software to create design files so that you can run it on your machine later on. The first and foremost thing we love about digitizing is that you can trace anything and not just floral. The world is evolving, and so is the fashion industry.
There is no definite rule to do it perfectly since we consider it a myth — unless you get pretty experienced in the field. However, you might need some guidance if you are doing it for the first time. The future of digitizing is quite bright, and if you are considering learning it, our stance is to go for it.
But keep one thing in mind: the process is no different as complex as the definition sounds. But it won’t waste your time because each mistake you’ll make will teach you what you shouldn’t be doing next time. Win-win, isn’t it?
The Process of Digitizing Artwork Designs
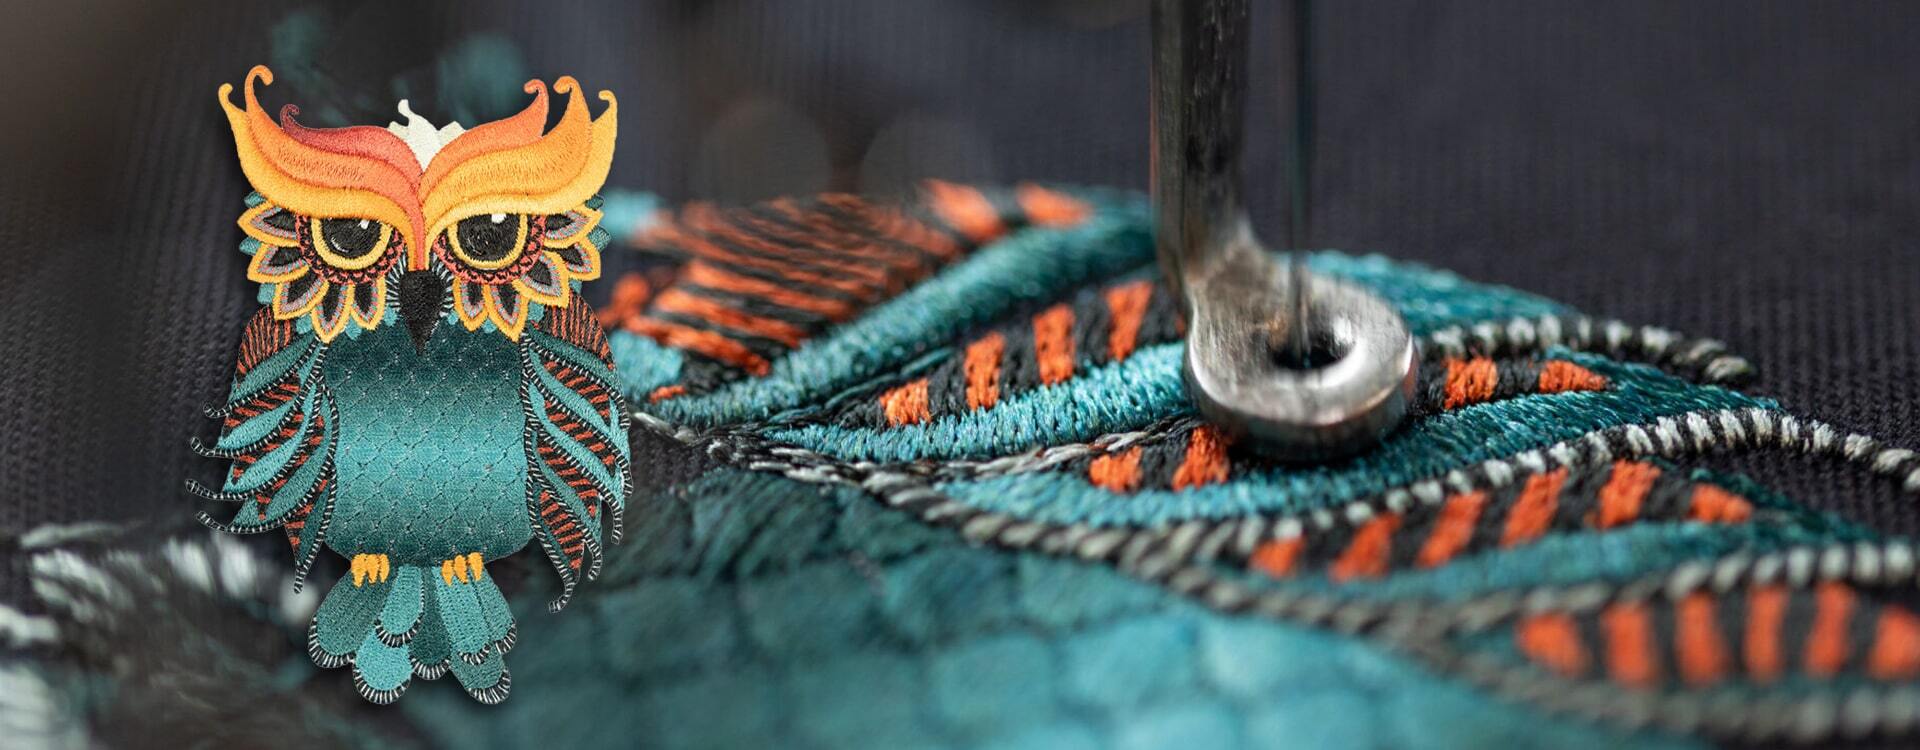
Moving on to the actual thing – the process of digitizing embroidery designs. Consider it just the beginning of something bigger you will be pursuing in the future — only if that’s what you want. Otherwise, you are free to choose your career path even if it’s mass production of motorcycle club patches. But if you are here reading the following article, you might have thought about it.
We know that each one of you has learned the basics like how you should be choosing stitches, the type of file you should run into your embroidery machine, and all that. But just like anything else, some dos and don’ts need to be followed to get the desired results. Here, we aren’t just talking about inexperienced people; sometimes, professionals also make the same mistakes. And it shows that it can happen to anyone, and it’s better to pay attention to the details to avoid repeating the same mistakes.
Know your Machine
The first step of starting your journey is to know your embroidery machine. The reason is quite simple: if you know nothing about machines, how will you operate them? Besides, it’s also essential to know which format is used and supported by it so you can digitize the designs. The selection of your digitizing software depends on your embroidery machine. Because not every machine supports every file format. However, you can choose from the commercial digitizing software mentioned below;
- Janome Digitizing Software
- Brother Embroidery designs software
- Husqvarna Premier+ Embroidery Software
- Embird Machine Independent Embroidery software
- Welcome Advanced digitizing software
Upload the File
The next step is to upload the file to the machine. All you are supposed to do is to transfer the file from one software to another. Since you know file formats used by the machinery, make sure you don’t mess it up.
You can also cut out the parts you don’t want into your design to make it more precise and appealing to the eyes. Keep it neat and clean.
Determine the size of your design to be digitized
This is the final stop if you are thinking of making changes to your design. Whether you want to add something or subtract, do it now. Because once the software starts working, it will deliver the same thing in terms of colors, stitches, and size. And when you are done with it, you can move to the next step but don’t forget to lock the image.
Stitches you prefer
Well, it’s totally up to your choice of stitches, but here are some suggestions you might need. Since there is a wide variety of types of stitches, here are some of the most commonly used ones you can consider.
- Straight stitch
- Satin
- Fill
The Navigation Map
When you are all set with your routine and finally choose the right stitch, move forward and set the direction of it. It works as a navigation device for your machine since technical machinery like embroidery machines isn’t familiar with automation. Whatever direction you set, the software will follow that, so ensure it’s exactly what you want. It saves a lot of time, and you will be satisfied with the outcome if you follow these steps.
Play with the colors
After defining the direction and selecting the right stitch for your design, it’s time to work on color combinations. Or, more precisely, the colors of threads you’ll be using. This isn’t the hard part because you don’t have to spend too much time selecting a color pallet since it will be according to the artwork or design you are working on.
For instance, if it’s a logo vector design, you don’t have to make any changes to it. Although you can change the colors when start digitizing — it’s better to follow the original pallet to get the finest results.
Don’t forget to save the file
As all basic steps are completed, save the file so you can run it on a machine later. It might sound funny, but this is where many people forget to save it, and everything goes down the drain. Hence, don’t burden yourself and follow the baby-steps rule. You might be thinking, who does that? Well, you must save it in various machine-readable formats and not just in one. That’s where people get confused. So there you have it! Don’t be forgetful this time.
Prepare your embroidery device
Well, you are almost done here in terms of digitizing the design. Now you just have to make it go through the machine, and you are required to prepare it. Check the needles, threads, the orientation of the design you are about to digitize, a piece of fabric that will be used for embroidery, its sequence, and every little detail.
Conclusion
We did not think that it would become this specified and brief guide for tracing an embroidery design to digitize it. But there is no harm in learning the whole process step by step. Lastly, we would like to add a professional tip here; before you start digitizing, it’s better to work on a sample so that you can be sure if the device is running properly or not! It’s always better safe than sorry, right?